
Few things say comfort quite like a sweet treat from the heart of the South. This classic southern dessert has graced kitchen tables for decades, bringing smiles to every face at the table. It represents a warm welcome and a long history of family heritage.

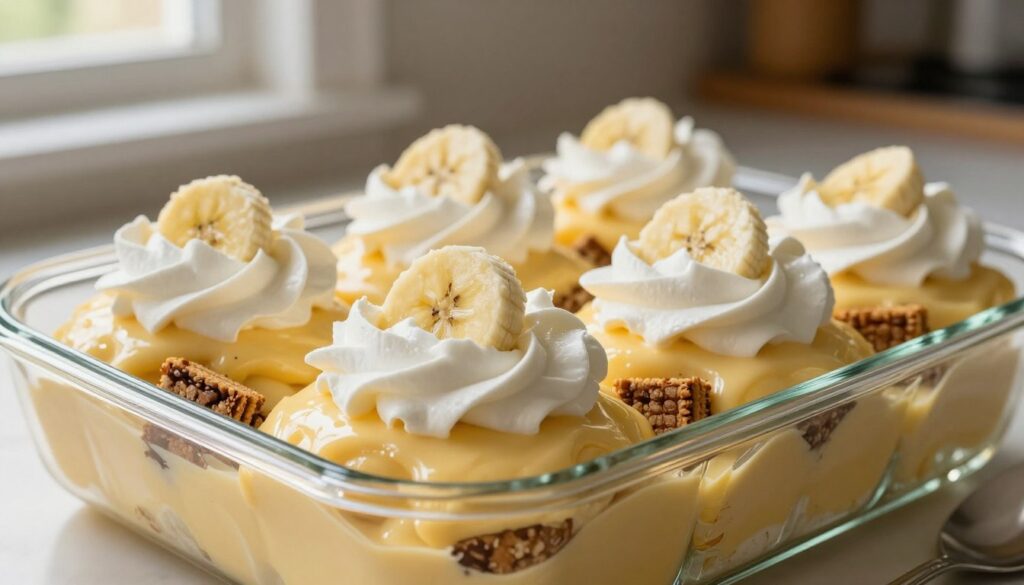
Creating the perfect banana pudding nilla wafers combo involves layering simple ingredients with plenty of love. The contrast between smooth custard and crunchy cookies makes every single bite truly unforgettable. You will find that this dish remains a staple at every potluck and holiday dinner across the country.
Whether you prefer it chilled or served warm, the recipe stays true to its humble roots. It is very simple to prepare and even easier to enjoy with your favorite people. This sugary masterpiece continues to be a beloved icon in American homes today.
Key Takeaways
- A cultural icon deeply rooted in American culinary history.
- Features a unique balance of creamy and crunchy textures.
- Requires very little preparation time for home cooks.
- Ideal for serving large groups at holiday gatherings.
- Relies on simple, budget-friendly pantry staples.
- Offers a nostalgic taste that appeals to all ages.
The Timeless Appeal of Southern Banana Pudding
The allure of Southern banana pudding lies in its perfect blend of simplicity and indulgence, making it a timeless favorite. This traditional banana pudding has been a staple in Southern cuisine for generations, with its rich history and cultural significance woven into the fabric of the region.
A Brief History
Southern banana pudding has its roots in traditional English trifles and custards, which were adapted by Southern cooks using locally available ingredients like bananas and Nilla wafers. Over time, it evolved into a distinct dessert that is both comforting and indulgent.
This dessert is more than just a treat; it’s a symbol of Southern hospitality and warmth. It’s often served at family gatherings, church functions, and community events, bringing people together with its creamy texture and sweet flavor.
| Occasions | Significance of Southern Banana Pudding |
|---|---|
| Family Gatherings | Brings families together, evoking nostalgia and warmth. |
| Community Events | Serves as a comfort dessert, fostering a sense of community. |
| Traditional Celebrations | A staple dessert that adds to the festive atmosphere. |
The enduring popularity of southern banana pudding can be attributed to its ability to evoke a sense of nostalgia and comfort. It’s a dessert that not only satisfies the palate but also connects people to their heritage and to each other.
What Makes Banana Pudding Nilla Wafers a Perfect Combination
Nilla Wafers and banana pudding are a match made in heaven in Southern cuisine. This classic combination has been a staple in Southern desserts for generations, and for good reason. The pairing of creamy banana pudding and crunchy Nilla Wafers creates a delightful contrast of textures that complements the natural sweetness of bananas.
The History of Nilla Wafers in Southern Desserts
Nilla Wafers have been a part of Southern desserts for over a century. Introduced in the late 1800s, Nilla Wafers quickly became a popular ingredient in many traditional Southern recipes. Their mild vanilla flavor and crisp texture made them an ideal component for desserts like banana pudding.
The use of Nilla Wafers in banana pudding is believed to have originated as a practical solution for using up stale wafers. By layering them with fresh bananas and creamy pudding, the wafers absorb the liquid and soften, creating a delicious and cohesive dessert.
Why Vanilla Wafers Work Better Than Other Cookies
While other cookies could potentially be used in place of Nilla Wafers, their unique characteristics make them particularly well-suited for banana pudding. Here are a few reasons why:
- Nilla Wafers have a mild flavor that complements the bananas and pudding without overpowering them.
- Their crunchy texture provides a pleasant contrast to the creamy pudding and soft bananas.
- Nilla Wafers absorb the pudding’s liquid nicely, softening to a perfect texture.
To illustrate the advantages of Nilla Wafers, let’s compare them to other common cookies:
| Cookie Type | Flavor Profile | Texture | Suitability for Banana Pudding |
|---|---|---|---|
| Nilla Wafers | Mild Vanilla | Crunchy | Excellent |
| Chocolate Chip Cookies | Sweet, Chocolatey | Soft/Chewy | Poor |
| Oreo Cookies | Strong Chocolate | Crunchy/Creamy | Fair |
| Shortbread Cookies | Buttery | Crumbly | Good |

In conclusion, the combination of banana pudding and Nilla Wafers is a classic for a reason. The history and characteristics of Nilla Wafers make them an ideal ingredient in this beloved Southern dessert.
Essential Ingredients for Homemade Banana Pudding
The foundation of a great banana pudding lies in its simple yet high-quality ingredients. To create an easy banana pudding recipe, it’s essential to understand the role of each component.
Selecting Fresh, Ripe Bananas
Choosing the right bananas is crucial for the best banana pudding recipe. Opt for bananas that are ripe but still firm. Avoid bananas that are too green, as they won’t provide the desired sweetness, or too brown, as they may be overripe.
Ripe bananas will be slightly soft to the touch and have a few brown spots on the skin. For the best flavor, use bananas that are at room temperature.
Nilla Wafers: Original vs. Reduced Fat
Nilla Wafers are a classic component of homemade banana pudding. When deciding between original and reduced-fat Nilla Wafers, consider the flavor and texture you prefer. Original Nilla Wafers provide a richer, more authentic taste, while reduced-fat versions can be a slightly healthier alternative.
The difference in fat content can affect the overall texture of your pudding. Original wafers tend to soften more evenly, while reduced-fat wafers might become too soggy if overexposed to the pudding mixture.
Milk, Eggs, and Sugar for the Custard
The custard is a critical element of banana pudding, and its quality depends on the freshness and quality of the milk, eggs, and sugar. Use whole milk for a richer flavor, and fresh eggs for a creamy texture.
Granulated sugar is typically used to balance the flavors. You can adjust the amount of sugar to your taste, but be aware that it also helps to stabilize the custard.
Choosing Between Meringue and Whipped Cream
The topping can make or break your banana pudding. You can choose between a light, airy meringue or a rich, creamy whipped cream. Meringue adds a nice textural contrast and a slightly caramelized flavor when baked.
Whipped cream, on the other hand, provides a smooth, cool finish. Consider your preference and the overall theme of your dessert when deciding between these two options.
By carefully selecting each ingredient, you’ll be well on your way to creating a delicious homemade banana pudding that will impress your family and friends.
Kitchen Tools and Equipment You’ll Need
Having the right kitchen tools is crucial for making a delicious banana pudding. To prepare this classic dessert, you’ll need a few essential items.
You’ll need a medium saucepan for cooking the custard, a whisk for mixing, and measuring cups and spoons for accurate ingredient measurements. A mixing bowl is necessary for beating eggs and whipping cream. If you choose to make a meringue topping, you’ll also need an electric mixer.
| Tool/Equipment | Purpose |
|---|---|
| Medium Saucepan | Cooking the custard |
| Whisk | Mixing ingredients |
| Measuring Cups and Spoons | Accurate measurements |
| Mixing Bowl | Beating eggs and whipping cream |
| Electric Mixer | Beating meringue topping |
Making a classic banana pudding recipe or an old fashioned banana pudding requires attention to detail and the right tools. With these essentials, you’ll be well on your way to creating a delicious dessert.
Making Homemade Vanilla Custard from Scratch
To achieve the perfect homemade banana pudding, one must master the art of making vanilla custard from scratch. This crucial component is what sets traditional banana pudding apart from its less authentic counterparts.
Step 1: Whisking the Egg Mixture
The process begins with whisking together eggs, sugar, and a pinch of salt until the mixture becomes pale and thick. This step is essential for incorporating air and ensuring the custard’s smooth texture.
Step 2: Tempering Eggs to Prevent Curdling
Tempering the eggs is a critical step that prevents curdling when the hot milk is added. Gradually pour the warm milk into the egg mixture, whisking constantly to maintain a smooth consistency.

Step 3: Cooking Until Thick and Creamy
Cook the tempered mixture over medium heat, stirring constantly, until it thickens and coats the back of a spoon. This step requires patience and attention to avoid lumps.
Step 4: Cooling and Adding Vanilla Extract
Once the custard is cooked, remove it from the heat and let it cool slightly. Stir in high-quality vanilla extract to enhance the flavor. The custard is now ready to be used in your traditional banana pudding recipe.
| Step | Description | Tips |
|---|---|---|
| 1 | Whisking the Egg Mixture | Use room temperature eggs for better volume. |
| 2 | Tempering Eggs | Whisk constantly to prevent curdling. |
| 3 | Cooking the Custard | Stir constantly over medium heat. |
| 4 | Cooling and Flavoring | Use high-quality vanilla extract. |
Creating the Perfect Meringue Topping
The crowning glory of a classic banana pudding with Nilla wafers is undoubtedly its meringue topping, a delicate balance of texture and flavor. A well-crafted meringue adds a layer of sophistication and visual appeal, making it a crucial component of this beloved dessert.
To achieve the perfect meringue, it’s essential to follow a few key steps. First, the egg whites must be prepared correctly to ensure they whip up to the right consistency. This involves bringing them to room temperature, a simple yet crucial step that affects the overall texture of the meringue.
Step 1: Bringing Egg Whites to Room Temperature
Bringing egg whites to room temperature is vital for achieving the right consistency. Cold egg whites will not whip up as well as those at room temperature. To do this, simply remove the eggs from the refrigerator and let them sit at room temperature for about 30 minutes before using.
Step 2: Beating to Soft Peaks
Once the egg whites are at room temperature, it’s time to start beating them. Begin at a medium speed and gradually increase to high. Beat the egg whites until they form soft peaks. This stage is crucial as it lays the foundation for the meringue’s structure.
Step 3: Incorporating Sugar for Stability
With the egg whites at the soft peak stage, it’s time to incorporate sugar. Gradually add sugar while continuing to beat the egg whites. The sugar not only adds sweetness but also helps stabilize the meringue, giving it the necessary structure to hold its shape when baked.
Step 4: Achieving Glossy Stiff Peaks
Continue beating the egg mixture until it reaches the stiff peak stage. The meringue should be glossy and firm, holding its shape when the beaters are lifted. This stage is critical for a stable meringue that will not collapse during baking.
| Step | Description | Tips |
|---|---|---|
| 1 | Bring egg whites to room temperature | Let eggs sit at room temperature for 30 minutes |
| 2 | Beat egg whites to soft peaks | Start at medium speed, increase to high |
| 3 | Incorporate sugar for stability | Add sugar gradually while continuing to beat |
| 4 | Achieve glossy stiff peaks | Continue beating until meringue is firm and glossy |
By following these steps, you can create a meringue topping that is not only visually appealing but also adds a delightful texture to your banana pudding with Nilla wafers. This easy-to-follow guide ensures that your dessert is both delicious and visually stunning, perfect for any occasion.
Assembling Your Classic Banana Pudding
The moment of truth arrives when it’s time to assemble your classic banana pudding, layer by layer. This process is not just about stacking ingredients; it’s an art that requires a bit of finesse to achieve the perfect balance of flavors and textures.

Step 1: Arranging the First Layer of Nilla Wafers
Begin by arranging a layer of Nilla Wafers in the bottom of your serving dish. This layer is crucial as it provides a crunchy base for your pudding. Ensure the wafers cover the entire surface, though it’s okay if they don’t form a perfect layer.
Step 2: Slicing Bananas for Even Coverage
Next, slice your bananas into rounds and layer them over the Nilla Wafers. The goal is to achieve even coverage, so try to make your slices as uniform as possible. This ensures every bite has a good balance of banana and pudding.
Step 3: Spreading Warm Pudding Over Bananas
Pour your warm pudding mixture over the bananas, spreading it evenly to cover all the fruit. This step is critical for infusing the bananas with the creamy pudding flavor.
Step 4: Building Additional Layers
Continue building your banana pudding by adding more layers of Nilla Wafers, bananas, and pudding. The number of layers can vary depending on your dish size and personal preference.
Step 5: Topping with Meringue or Whipped Cream
For the final touch, top your banana pudding with either a meringue topping or whipped cream. Both options add a delightful textural contrast and enhance the dessert’s visual appeal.
Step 6: Baking or Chilling to Perfection
Finally, if you’ve chosen to top your pudding with meringue, bake it in the oven until golden brown. If using whipped cream, simply chill the pudding in the refrigerator until it’s time to serve. Either way, this final step ensures your banana pudding is perfectly set and ready to enjoy.
By following these steps, you’ll be able to create a stunning and delicious classic banana pudding with Nilla wafers that’s sure to impress.
Expert Tips for the Best Banana Pudding Recipe
To elevate your banana pudding game, consider these expert tips that will make your dessert stand out. Crafting the perfect southern banana pudding requires attention to detail and a few insider secrets.
Preventing Bananas from Turning Brown
One common issue with banana pudding is bananas turning brown. To prevent this, sprinkle sliced bananas with a little lemon juice or soak them briefly in a mixture of water and lemon juice. This simple step will keep your bananas looking fresh and appealing.
Getting the Right Pudding Consistency
Achieving the right consistency is crucial. Use a combination of cornstarch and eggs to thicken your pudding. Cook it slowly over medium heat, stirring constantly, until it reaches your desired thickness.
Timing the Wafer Softness Just Right
Nilla wafers are a key component. To achieve the perfect softness, add them to the pudding just before serving, or let them sit in the pudding for a few minutes if you prefer them softer.

Avoiding Watery or Runny Pudding
To avoid a watery pudding, ensure that your custard is cooked long enough. Also, be mindful of the ratio of milk to thickening agents. Avoid overmixing, as this can cause the pudding to become too thin.
Meringue Weeping Prevention
Meringue weeping can be prevented by spreading the meringue to the edges of the dish, ensuring it’s sealed. Also, bake the pudding until the meringue is golden brown.
By following these expert tips, you’ll be well on your way to creating the best banana pudding recipe that your family and friends will love.
Creative Variations on Old Fashioned Banana Pudding
From no-bake versions to decadent chocolate twists, the possibilities for reinventing banana pudding are endless. This classic dessert can be modified in various ways to suit different tastes and occasions.
Easy No-Bake Banana Pudding with Instant Pudding
For a quick and effortless dessert, consider making a no-bake banana pudding using instant pudding mix. This version simplifies the traditional recipe by eliminating the need to cook the custard from scratch.
- Combine instant vanilla pudding mix with milk to create a creamy base.
- Layer the pudding mixture with Nilla wafers and sliced bananas in a serving dish.
- Chill until set, then top with whipped cream.
Chocolate Lover’s Banana Pudding
Chocolate and banana are a match made in heaven. To create a chocolate lover’s banana pudding, incorporate cocoa powder or melted chocolate into the pudding mixture.
Key steps include:
- Adding cocoa powder to the pudding mix for a deep chocolate flavor.
- Using chocolate Nilla wafers or chocolate sandwich cookies for added flavor.
- Topping with chocolate shavings or chocolate whipped cream.
Salted Caramel Banana Pudding
For a more sophisticated twist, try adding a salted caramel element to your banana pudding. This can be achieved by drizzling salted caramel sauce over the layers or incorporating it into the pudding.
The salted caramel adds a rich, complex flavor profile that complements the sweetness of the bananas and Nilla wafers.
Mason Jar Individual Servings
Mason jars are perfect for creating individual servings of banana pudding. Layer the ingredients in the jars for a visually appealing dessert that’s great for gatherings or parties.
Storage, Make-Ahead Tips, and Serving Suggestions
After mastering the art of making banana pudding with Nilla wafers, the next step is learning how to keep it fresh and present it appealingly. Whether you’re preparing for a family gathering or a potluck, understanding the best practices for storing and serving your homemade banana pudding is crucial.
How to Store Banana Pudding Properly
To maintain the freshness and quality of your banana pudding, it’s essential to store it correctly. Cover the dish with plastic wrap, pressing the wrap directly onto the surface of the pudding to prevent a skin from forming. For an extra layer of protection, you can cover the dish with aluminum foil.
Refrigeration is key: Always store banana pudding in the refrigerator at a temperature below 40°F (4°C). This slows down the ripening process of the bananas and keeps the custard fresh.
Shelf Life and Freshness Guidelines
Homemade banana pudding typically lasts for 2 to 3 days when stored properly in the refrigerator. The bananas may start to brown after a day, but this doesn’t necessarily mean the pudding has gone bad. However, for the best taste and texture, it’s recommended to consume it within 24 hours.
| Storage Method | Shelf Life | Notes |
|---|---|---|
| Refrigerated | 2-3 days | Cover with plastic wrap and aluminum foil |
| Freezer (without meringue) | 1-2 months | Thaw in refrigerator; texture may change |
Make-Ahead Instructions for Gatherings
Banana pudding is an excellent make-ahead dessert. You can prepare the pudding and assemble the layers a day in advance. However, it’s best to add the meringue or whipped cream just before serving to maintain its texture.
Tip: If you’re preparing for a large gathering, consider making individual servings in mason jars. This not only looks appealing but also makes serving easier.
Best Ways to Serve and Present
Presentation matters when serving banana pudding. You can garnish with additional Nilla wafers, banana slices, or a sprinkle of nutmeg on top. For a more elegant look, serve in individual cups or glasses.
By following these storage, make-ahead, and serving tips, you can ensure that your homemade banana pudding remains a delightful treat for your family and friends.
Conclusion
Banana pudding with Nilla Wafers is a timeless classic southern dessert that never fails to impress. By following the steps outlined in this article, you can create a deliciously creamy and layered dessert that’s perfect for any occasion.
The combination of fresh bananas, homemade vanilla custard, and crunchy Nilla Wafers makes for a truly unforgettable treat. Whether you’re serving it at a family gathering or simply satisfying a sweet craving, banana pudding nilla wafers is sure to be a hit.
With its rich history and versatility, this classic dessert continues to be a beloved favorite among many. So why not give it a try? Gather your ingredients, follow the recipe, and indulge in the comforting taste of this classic southern dessert.